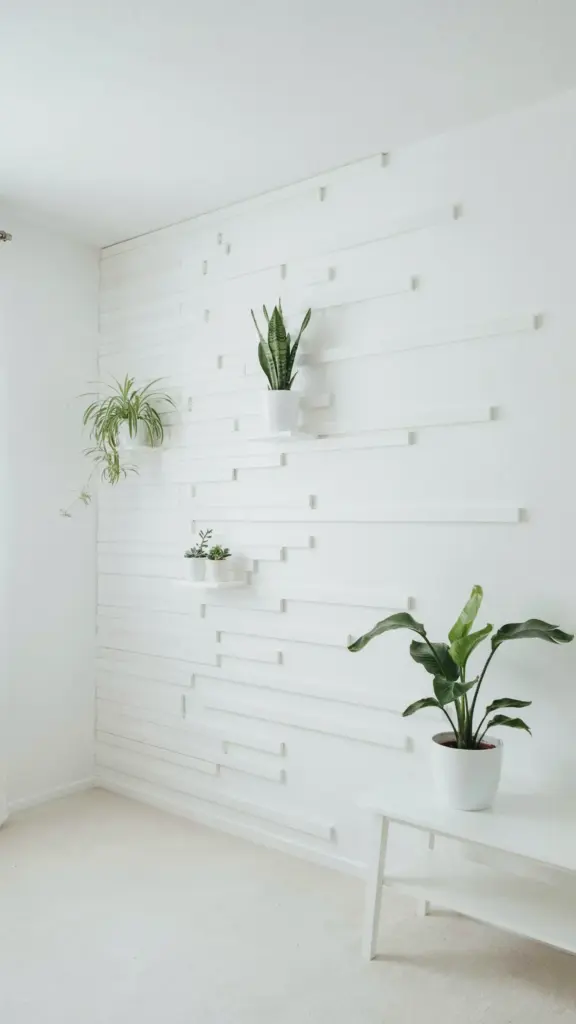
The wall in my hallway was a blank beige rectangle for two years. When I finally decided to tackle a wood accent wall, I thought I would need to hire a carpenter. Then I found custom accent wall plans as a digital download, and the whole project turned into a fun weekend. The blueprints showed me exactly where every piece of trim should go, and the cutting list meant I walked into the hardware store with total confidence.
Wood Accent Wall Ideas That Work in Any Room
A wood accent wall does more than add texture. It gives a plain room a focal point without major renovation. I looked at dozens of photos online, and the ones that stood out all used simple trim patterns. You can create a grid, vertical slats, or a classic board and batten layout.
The trick is finding a plan that fits your space and skill level. Some patterns require a miter saw and a brad nailer, while others only need a drill and measuring tape. The best part is that most wood accent walls use inexpensive lumber from the home center.
Modern Trim Wall Blueprints for the Minimalist Slat Look
If you want a clean, architectural feel, vertical slats are the way to go. The modern trim wall blueprints in this style call for evenly spaced boards running from floor to ceiling. The spacing matters more than you think, so having a template takes the guesswork out of the process.
I used 1×2 pine boards for the slats and painted them the same color as the existing wall. The result was subtle but sculptural. If you prefer contrast, paint the slats white and leave the wall behind them in a dark tone. That simple trick makes the wall look custom and expensive.
Accent Wall Plans for the Classic Board and Batten Style
For a warm, farmhouse vibe, board and batten is a timeless option. The accent wall plans for this style include wide vertical boards with narrow battens covering the seams. It reads as traditional, but you can adjust the spacing to feel more modern.
The cutting list in these plans separates the base rail, top rail, and battens, so you know exactly how many pieces to cut. This is one of the easiest projects to do in a weekend, even if you have never used a nail gun before. I started with this pattern in a spare bedroom and loved the result.
Using a Digital Download to Build a DIY Wood Wall Without Guesswork
The biggest surprise for me was how much confidence a good digital download gives you. Instead of watching conflicting YouTube videos, I had one clear set of instructions. Every measurement was written down, and the diagrams matched the dimensions of my wall.
Here is what the custom digital download includes:
- PDF blueprints with scaled diagrams
- A full cutting list sorted by board size
- A material list with approximate wood lengths
- Step by step instructions with photos
- Tips for working around outlets and switches
That last tip saved me. My wall had an outlet right in the middle of the pattern, and the plans showed me how to frame around it safely. Without that guidance, I probably would have made a clumsy cut and ruined a whole board.
How to Choose the Right Accent Wall Plans for Your Space
Before you buy any accent wall plans, measure your wall carefully. Write down the height, width, and any obstacles like doorways or vents. Look for plans that list a few pattern variations, because a grid that looks great on a wide wall might feel too busy in a narrow hallway.
Also think about the room style. A modern trim wall with geometric squares suits a contemporary living room, while vertical slats feel more relaxed in a bedroom. Board and batten works well in dining rooms and entryways. You want the pattern to complement the existing furniture, not fight it.
Skill level matters too. Choose a plan that uses simple cuts if you are new to woodworking. Some patterns involve angled cuts and careful layout. Others are just straight cuts and spacers. A good plan tells you what tools you need before you start, so you are not halfway through and stuck.
Putting It All Together: From Digital Download to Finished Wall
Once you have picked your plan, the process is pretty straightforward. Prep the wall by cleaning it and marking the studs with a pencil. Cut the trim pieces according to the cutting list, then attach the base or layout boards first. Use construction adhesive and a nail gun for a strong hold.
Spacing blocks are usually included in the plan, or you can make your own from scrap wood. Work in small sections so the adhesive does not dry before you get the boards in place. After everything is nailed up, fill the nail holes with wood filler and paint or stain the entire wall.
I finished my wood accent wall in a weekend, and it absolutely changed the room. The hallway went from forgotten to actually interesting. Every time I walk past it, I know I built it myself, and that feeling does not fade.
A wood accent wall is easier than most people think, especially when you have solid plans to follow. Save this for your next DIY, and grab the digital download plans to get started. You will be surprised how far a little trim and a measured drawing can take you.