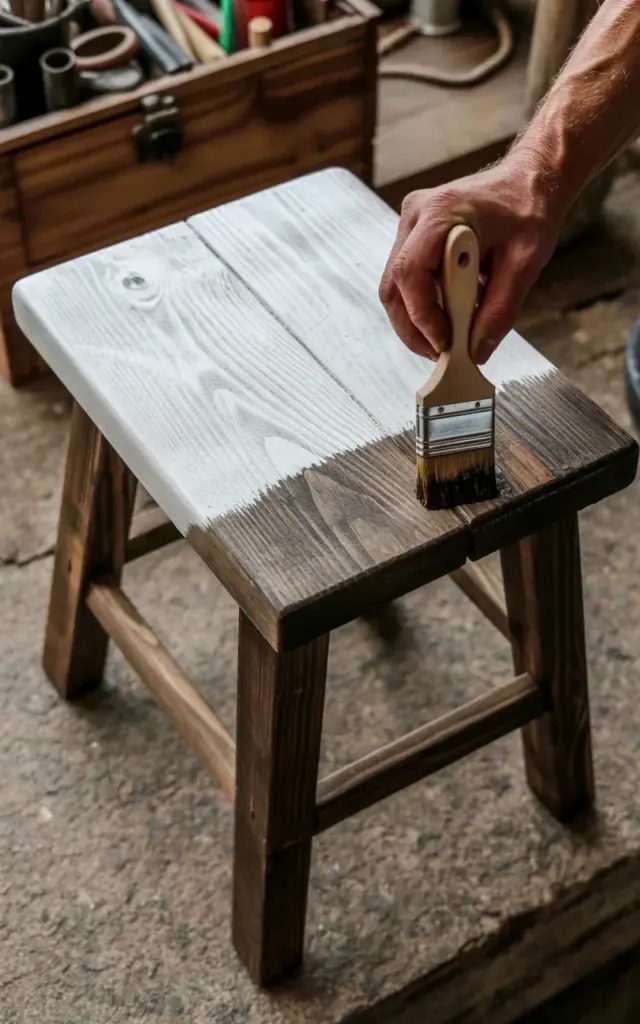
Ok so I have this image on my phone. It is peak “mid project” chaos. A hand, smeared with dark stain, gripped around a stool leg. The top of the stool is already done, a soft whitewash that highlights every knot and groove. The concrete floor is catching the inevitable drips. And yeah, that toolbox in the back is my trusty sidekick. This whole post is basically about that exact moment, the process of staining a reclaimed wood stool and making it look intentionally two toned. Let me walk you through why this look works and how you can pull it off yourself.
The Contrast is the Whole Point
Honestly, a solid color stool is fine. But a two-tone stool? That grabs your attention. The light, chalky top against the deep, almost espresso legs creates a visual anchor. It tricks the eye into seeing a high-end rustic piece.
Here is the thing about reclaimed wood. It already has a story. A whitewash top lets that story shine through without competing with the room. Then you ground it with dark legs. It keeps the piece from floating away visually. It is a simple trick but it works every single time.
Picking Your Finish for the Top (Whitewashed and Distressed)
Not gonna lie, the top of this stool was my favorite part to finish. The whitewash is forgiving. You slap it on and immediately wipe it back off. The wood grain patterns pop right out at you. It is definitely not a solid paint look. It is more of a veil.
I used a water based whitewash pickling stain for this one. But you could easily just use a heavily thinned white paint. The goal is to let the weathered, distressed look of the wood stay front and center. Don’t sand too smooth up top. You want those little cracks and dings. They give the whitewash something to grip onto.
Going Dark on the Base (Applying That Deep Brown Stain)
Look at the photo again. That hand is applying stain to the legs. You can see the color soaking in. I went with a deep brown, a mix of dark walnut and just a touch of ebony. You don’t need a formula. Just go dark.
And here is a weird little confession. I have to fold my staining rag a specific way. A sloppy rag drives me crazy. It grabs lint. Anyway. Apply the stain generously with a brush or rag on those simple straight posts. Let it sit for five minutes. Wipe off the excess. The contrast between that dark leg and the pale top is where the magic happens.
Prepping Reclaimed Wood (Yes, It Makes a Difference)
Reclaimed wood is dirty. It has traveled. It has lived another life. Before you even open the can of stain, you need to clean it. A stiff brush and some soapy water will knock off the grit. Then let it dry for a full day.
- Cleaning brush: A stiff nylon brush. Gets into the grain.
- Sandpaper: 120 grit for the legs. Don’t touch the top too much, you want that distress.
- Tack cloth: Get the dust off. Especially on the legs. Dust ruins a smooth stain application.
- Stain: I used Minwax Dark Walnut. Small can is enough for a stool.
- Rags: Cotton t-shirt rags. No lint left behind.
If you skip the cleaning step, the stain will repel in spots. That can look cool on the top but sloppy on the legs. Prep is boring but necessary.
Setting Up Shop (Concrete Floors and Toolboxes)
You can see in the background that I am working on a rough concrete floor. Honestly, this is the best surface for staining. If you spill stain (and you will), it just wipes up. No worrying about ruining a nice table or a drop cloth that shifts around.
And that toolbox. It is beat to hell. Got it for five bucks at a garage sale. It holds all my go-to supplies. Foam brushes, stir sticks, gloves. Keeping everything in one spot means I am not running around looking for a screwdriver mid-project. It keeps the momentum going.
Sealing the Deal (Protecting Your Work)
So you have the whitewash top and the dark legs. You love it. Now you have to protect it. A raw whitewash top will stain if someone sets a coffee cup on it. A dark leg will scuff.
For the top, I use a matte polyurethane. Water based works best. It dries clear and won’t yellow that chalky white look. For the legs, you can use the same poly or a wax. I used poly because it is tougher. Reclaimed wood moves and shrinks. A good sealer keeps the finish locked in. Do a couple of thin coats. Sand lightly between them with a 220 grit. It takes an extra hour but saves you from having to refinish the stool next year.
Two Tone Stool Variations to Try
This specific look is a whitewash top and dark legs. But you can spin the two-tone idea a hundred ways. That is what I love about furniture refinishing. It is a template.
Try a black base with a natural cedar top. Or do a dark green stain on the legs and leave the top completely raw. The contrast does not have to be white and brown. It could be gray and navy. Or even a bright painted leg with a natural wood top. The idea is to break the monotony. Pick two finishes that fight each other just a little bit. That tension looks intentional.
At the end of the day, a stool is a small project. It is a test bed for ideas. If you mess it up, you are only out a piece of reclaimed wood and an afternoon. But if you nail it, you have a piece of furniture that looks like it cost three times what you spent.
I would love to hear what color combos you try on your own rustic stool. Drop a comment or tag me in your photos. Happy building.
#staining #reclaimedwood #DIYfurniture #rusticstool #woodworking